Hey everyone, I hope you are having an incredible day today. Today, I will show you a way to make a distinctive dish, basic japanese shio onigiri (salted rice balls). One of my favorites food recipes. This time, I’m gonna make it a little bit tasty. This is gonna smell and look delicious.
This post may contain affiliate Various Fillings for Onigiri (Japanese Rice Balls). Because of its popularity in Japan, all different That's why salt is rubbed on hands when you make onigiri so that rice is kept safe for a longer time. Onigiri means rice ball in Japanese.
Basic Japanese Shio Onigiri (Salted Rice Balls) is one of the most favored of recent trending foods on earth. It’s easy, it is quick, it tastes delicious. It’s appreciated by millions every day. Basic Japanese Shio Onigiri (Salted Rice Balls) is something which I have loved my entire life. They’re nice and they look fantastic.
To begin with this recipe, we have to prepare a few components. You can cook basic japanese shio onigiri (salted rice balls) using 7 ingredients and 6 steps. Here is how you can achieve it.
The ingredients needed to make Basic Japanese Shio Onigiri (Salted Rice Balls):
- Prepare 1 cup Japanese white rice(150g)
- Get 1/2 teaspoon Salt
- Make ready (1/2 teaspoon Ajinomoto)
- Make ready 1/2 teaspoon Vegetable oil
- Take 2 leaves Green shiso
- Make ready Some Seaweed(Nori)
- Prepare Some Plastic wrap(Cling wrap)
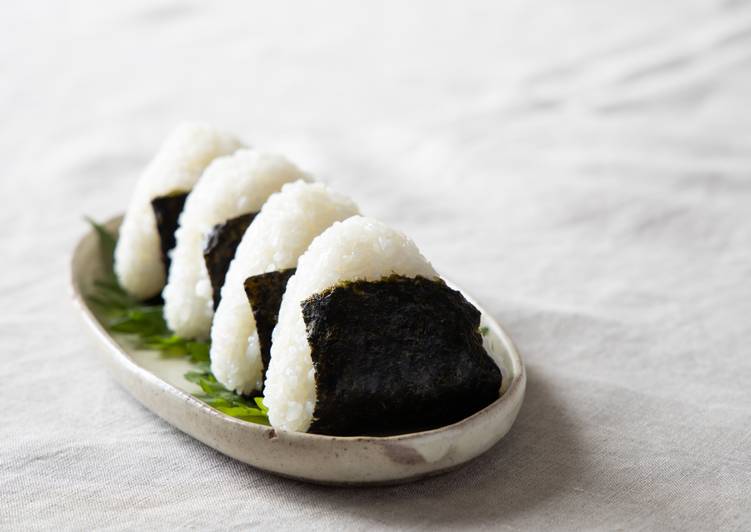
This is the very basic of Japanese cuisine. Japanese rice balls, also known as onigiri or omusubi, are a staple of Japanese lunch boxes (bento). They are usually shaped into rounds or triangles by The rice can also be mixed with a flavorful add-in like furikake. Furikake is like the salt and pepper of Japan and consists of toasted sesame seeds, sea.
Instructions to make Basic Japanese Shio Onigiri (Salted Rice Balls):
- Cook rice in a rice cooker.
- Use freshly cooked rice for Onigiri. Once the rice is cooked, fold up the rice using a spatula to allow excess steam to escape.
- Place the rice into a bowl. Add salt, salad oil (and ajinomoto if you want to add more flavors) and mix well.
- Check how it tastes like and adjust the amount of salt. (When the rice cools down, it tastes less salty. Please also change the amount of salt depends on the time you eat this Onigiri.)
- Divide the rice into 4 portions, put each portion on a plastic wrap. First, make a round shape by wrapping softly. And then shape into triangle. Do not push or press hard when shaping Onigiri. After you finish shaping, remove the plastic wrap first to avoid rice from getting wet by extra moisture.
- Once the Onigiri cools down or when all the extra moisture evaporates, wrap with seaweed. To make the seaweed crisp and fresh, put them in a frying pan and warm them up for a few minutes to remove moisture. Place few leaves of green shiso and arrange Onigiri on a plate.
Using Japanese short-grain rice is the key to tender onigiri even after the rice balls have cooled to room temperature. Using freshly cooked rice that's just Salt - Although onigiri fillings tend to be very salty, there's only a small amount in the very center, so your onigiri will taste much better if you salt. They're fun to make and are a staple of Japanese lunchboxes Nutritional Information. I found great directions in the internet for rolling and twisting them in wet salted plastic wrap which took. Rice balls don't really need a recipe to make.
So that is going to wrap this up with this special food basic japanese shio onigiri (salted rice balls) recipe. Thank you very much for your time. I am sure you will make this at home. There’s gonna be more interesting food at home recipes coming up. Remember to save this page in your browser, and share it to your loved ones, friends and colleague. Thanks again for reading. Go on get cooking!